Browsed by
Month: July 2015

The Digital Academy: Video Editing

The Digital Academy: Video Editing

Screen Shot 2015-08-03 at 1.59.29 PM

There’s lots of fancy and expensive software you can use to edit video. Oftentimes, the many steps and $$$ required excludes a lot of people. But there are video editing tools that are available to anyone with a computer and an internet connection. Like youtube!

Log into the google account listed on the sheet inside your envelope.

  1. Go to the Youtube video editor. (You can find it linked under the upload link.)
  2. Create a new video merging at least three of the videos you see listed in the youtube channel.
  3. Edit the videos you’ve chosen. You can trim the videos by dragging the left or the right side of them. You’ll need some buffer room on either side of them if you want to use transitions! It makes them overlap slightly.
  4. Add transitions, text, and/or other effects.
  5. If you want to, add a soundtrack.
  6. Put your name in the title of your video so you’ll be able to see which one’s yours!
  7. When you’re happy with your video, press the create video button.
  8. Embed your edited video on your blog. (How to)
  9. Tweet your video using the hashtag #digitalacademy!
The Digital Academy: Quicktime Screencast

The Digital Academy: Quicktime Screencast

Screen Shot 2015-08-03 at 2.25.03 PMRemember how you thought about something on the library’s website that you’d like to show a brand new student? Something that would be useful to them?

  1. Use Quicktime to create a screencast less than 1 minute long showing students how to do one thing on the website.
  2. Upload your screencast to youtube using the username and login on your card.
  3. Embed your screencast on your blog. (Here’s how.)
  4. Tweet your post using the hashtag #digitalacademy!
The Digital Academy, day 2: Youtube Slideshow

The Digital Academy, day 2: Youtube Slideshow


  1. Log into google using the username and password on your card.
  2. Go to the upload page.
  3. Click the “create” button under photo slideshow.
  4. Make a slideshow! Choose your own pictures, or anyone else’s pictures! Mix and Match! Pick a theme, if you want to! Or don’t! Pick a soundtrack!
  5. When you’re done, upload your slideshow. (This will take a few minutes.)
  6.  Embed your slideshow on your blog. (How to)
  7. Tweet a link to your slideshow blog post with the hashtag #digitalacademy!
The Digital Academy, Schedule, day 1

The Digital Academy, Schedule, day 1

This week and next, I’m delivering a three day tech program for library staff called The Digital Academy. I’ve been using this blog to post a lot of the support materials for it, but I haven’t posted the entire thing. Here’s the pre-work and schedule for day one, which focused on text. This is the generic version. Feel free to take and modify it!

[googleapps domain=”docs” dir=”document/d/1xAmsaLQ2smjttytlEyDELnDnyJA0CMvyY_Mx63GOLSE/pub” query=”embedded=true” /]

The Digital Academy, day 2: Is there such a thing as too many animated gifs?

The Digital Academy, day 2: Is there such a thing as too many animated gifs?

reaction

With your partner, make two reaction gifs based on the emotions listed on your cards. The orange card is the positive emotion card.

happycard

The blue card is the negative emotion card. Be as creative as you like!

sadcard

How to:

  1. Go to the online gif maker tool. (There are many of these around the internet, but this one is super simple!)
  2. Pick “Create animated gif.”
  3. Select “Create gif from webcam.” What this does is give you an interface where you click the “add frame” button for each image in your gif. You click it a bunch of times to make the animated movie.

While it’s easiest to do this with a webcam, you can also take a bunch of screenshots, like doing old school animation, and create a video that way. That means you can create one of these for web instructions, too, like how to use a database or how to search the catalog. If you’ve got time, give it a shot!

You can do this as you like: you can both emote at the same time, or one person can control the computer while the other acts, and take turns, or you can find another way to communicate these emotions and portray them using the gif maker. Whatever you like! As long as you create two gifs that match the emotions you’ve got and post them!

Check out the settings, see what they do. If you want to start over with the gifmaker, just reload the page. Save your completed gifs to your computer, then post them on your blog. Tweet your finished creations with the tag #digitalacademy! Retweet your partner’s gif, too!

Welcome to the Digital Academy!

Welcome to the Digital Academy!

Some very polished, not at all too-fast talking words of introduction, explanation, and preparation:

[youtube https://www.youtube.com/watch?v=0VrJt5s0EZE]

And select your sandwich of choice for lunch!

[googleapps domain=”docs” dir=”forms/d/1egtrTbx-LsX8XqntwMHo7s_ZLgqxERm9-WaI2jHCpYk/viewform” query=”embedded=true” width=”760″ height=”500″ /]

The Digital Academy, day 1: 2:30

The Digital Academy, day 1: 2:30

It’s gotten very easy to publish text; you can write a blog post, post an article, and you can even make your own ebook.

  1. With ibooks author, make an ebook out of your blog post. (Here’s help with ibooks author.)
  2. Feel free to explore the templates and options! You can make it as simple or as complex as you like.
  3. Once you’re happy with it, upload your ebook into this box folder.
The Digital Academy, day 1: 11:30 – 12:30

The Digital Academy, day 1: 11:30 – 12:30

The brilliant thing about text on the internet is how easy it is to publish it, comment on it, and share it. Medium is a posting platform designed to make it easy to publish long-form articles as simply as possible. They’ve taken the idea marginalia and made it a reality. The point of Medium is to focus on the text, without all the bells and whistles. You’ve probably read a Medium article before without knowing it; Medium is about the content, not the platform.

  1. Go to Medium. Sign in using your twitter account.
  2. Read this article. Add a comment in the margin!
  3. Post your 1500 words as a Medium article. (How to.)
  4. Add your Wordle and/or Voyant images to your article.
  5. Post a link to your article on twitter with the hashtag #digitalacademy.
The Digital Academy, day 1: Morning Bonus Round

The Digital Academy, day 1: Morning Bonus Round

All done with Hemingway and Wordle? Try Voyant! Voyant is a digital humanities tool for analyzing text. It’s more complicated than Wordle, and doesn’t pull out definite articles and other common words by default. You need to tell Voyant exactly what you want it to do.

Scholars use this tool to analyze large blocks of text, like the complete works of Agatha Christie, or the complete works of Shakespeare.

  1. Paste your text in Voyant. Explore.
  2. Paste all our text into Voyant. Explore.
  3. Take screenshots and post them to your blog.
  4. Tweet your screenshots using the hashtag #digitalacademy.
The Digital Academy, day 1: 10am

The Digital Academy, day 1: 10am

Wordle is a word cloud generator. It will take any text and show you which words you use most often. It removes the most common words that don’t mean as much (like “the”) so that what you get is meaningful. Word clouds are often a good indicator of what a block of text is about. Is that true in your case? What does Wordle think we are collectively most interested in?

  1. Open Firefox. (Wordle only works in Firefox.)
  2. Paste the text of your blog post into Wordle.
  3. Tweak fonts, colours, and layouts at will.
  4. Once you like how it looks, take a screenshot and post it on your blog.
  5. Copy all the text in our shared document. Paste all the text into Wordle at once.
  6. Tweak fonts, colours, and layouts at will.
  7. Take a screenshot and post it on your blog.
  8. Tweet links to your screenshots at with the hashtag #digitalacademy!
The Digital Academy, day 1: 9am

The Digital Academy, day 1: 9am

Let’s explore how machines can analyze text! Hemingway is a web application that reads your text and makes editing suggestions.  Hemingway looks for adverbs, the passive voice, and overcomplicated words, highlights them for you, suggests ways to modify them, and tells you what your readability score is. A readability score tells you what level of education your reader must have to be able to understand what you’ve written. Hemingway will also tell you how long it would take to read your text out loud.

Note: you don’t need to take all of Hemingway’s advice. It’s a machine, not a human: it will probably make some mistakes when it looks at your text. The algorithm behind Hemingway looks for certain kinds of patterns it was programmed to find; it could have been programmed to look for different kinds of patterns in text. And in the end, it’s your post, so, just like with a human editor, you can always ignore its advice.

  1. Paste the text of your blog post into Hemingway.
  2. Explore Hemingway’s analysis and advice.
  3. Edit your text as you see fit.
  4. When you’re happy with your text, paste it into this document, under your name.

You have one hour.

The Digital Academy, Workshop #1: Text

The Digital Academy, Workshop #1: Text

Dear Digital Academy,

Let’s talk about text. It isn’t usually what we think of when we talk about digital media, though it’s often at the heart of it. We’ve been writing in higher ed since higher ed began, so it feels like the oldest media we’ve got. But what’s been happening behind the scenes all along are these subtle changes to the technology that have meant big changes to what we can do with text, from sharing it, responding to it, publishing it, to analysing it, like any other form of data.

There have been things we’ve dreamt about being able to do with text until now that seemed impossible; the margin that fits all the words you want to scribble in them without being cramped. The book with the font size you can change at will.  Dickens wrote chapters that were delivered as a serial; that went away, and then came back again. So I wanted to start our digital media creation workshop with text, because it’s familiar, a staple of higher ed, and we know how to create it. But also because the possibilities for text have changed so much, and keep changing. And because it’s so malleable, and there’s so much more we can do with it.

The big, and most obvious, change in the creation of text on the internet is how easy it is to put it there.  The ease of sharing text, sharing ideas, means we can share more, and earlier, we might have done before. We can share at the beginning of an idea. We can share when we reach the point of frustration. We can share every joyous discovery along the way to a solid hypothesis. We don’t have to just publish the result of our thinking anymore. We can publish the whole process, and we can let the process change our thinking.

I often wonder what academia would be like if, when it was first conceived, it was possible to share text and collaborate this way. Why shouldn’t academic work happen more openly, and be more influenced by others earlier in the process? We already know that collaboration and exposure to other people’s ideas makes our own ideas stronger and better. Why shouldn’t we take advantage of that?

So one of the things we’re exploring is how easy it is to publish written text. You’ve already done it with your blog post, and even with twitter. We’ll share your text a few more times using more platforms during our workshop on Thursday, too. All of them provide different ways to format, present, and publish text, and to get feedback from others.

Some of these platforms are easier than others to use, which I’m sure you’ll notice. That’s important: an easy, understandable, well-designed  interface means we can all do more with the tool behind it, it’s that simple.  That’s one of the current trends in technology user design: making the “technology” part  fade away so we can focus on the content part, the part we bring to it. An interface that doesn’t make you feel stupid is a really good interface. That’s one of the driving forces behind Medium, one of the platforms we’re going to explore. Medium is easy to sign up for, easy to publish on, and easy to comment on. Instead of comments at the bottom, like questions after a talk, you add comments to a Medium article  in the margins, attached to the bit you want to respond to. You can have whole conversations in the margins, because the margins are as big as they need to be.

Medium was designed with a focus on getting feedback, so in draft mode, a Medium article can be sent to any number of informal “editors” (or as I like to call them, “beta readers”) for feedback prior to publication. And on publication, Medium is designed so that everyone who contributed ideas to an article gets cited. It’s a new way to think about attribution and citation! Medium was created by the same team who created Blogger and Twitter. Their focus with Medium is on feedback, easy publishing, and a slick reading experience: all of these things can be useful to us in a higher ed context. You’ve probably read a Medium article before without realizing it, and that’s the whole idea. The ideas are more important than the platform.

We’re going to look at a few other tools too, including something called Scalar. Scalar is a platform for building a collaborative, multi-media book. I hope we can dig into this one and explore it together, because so far I’ve only scratched the surface of it, and collaborative publishing tools are best explored as a group! Scalar is an important tool in the digital humanities community, and the pedagogy track at the digital humanities institute used it quite intensively. I’m looking forward to digging into it with you and seeing what we think of it!

Speaking of digital humanities: another one of the things we can do with digital text is explore it as data. We’re going to do a bit of that, too. We’re used to reading text and gleaning themes from it; what happens when the machine does that work with us? What are the hidden themes in text? What ideas underlie what we say without our even knowing it? There are many opinions out there about what it means to bring machines into text, and all of them are interesting. You know that old adage about putting your writing aside for awhile so you can be objective the next time you look at it? The machine is always objective. We’re going to explore a few tools that will show you how a machine reads your text. Let’s see if it tells you anything you didn’t already know. You might be surprised!

You’ve done your homework, so you’re ready to go. A few bits to know going into Thursday: I’m not going to talk that much. We’re not getting together to listen to me drone on (though I do love an audience). We’re there to do stuff, and we’re going to do it together. So don’t feel like you have to not talk to your neighbour or try hard to avoid “being disruptive”. Please: be disruptive! Everything we do on Thursday we’re meant to do together, and we’re meant to talk about it as we go. Grab a friend. Grab a few! Ask your questions. Make your observations. Exclaim! Ask for help! Ask what other people are doing if you see something interesting! Announce what you’ve discovered! You won’t be interrupting. Talking as we go is 100% the point. We each have at least as much to learn from each other as we do from these tools. So don’t hold back! If you’re uncomfortable sitting, stand up. If you want to move to a different seat, do it. This room has no front-of-the-class. Learning is a bit chaotic at the best of times, and this will certainly be the best of times.

One of the things I’m asking you to do during this workshop is to think about everything you’re doing as you do it. As you learn about it and understand it, think: what could I do with this? What could my colleagues do with this? What could the library do with this? What could students, faculty, staff do with this? What could I do with it if it were slightly different? Or very different? While you’re at the workshop, you’ll have these cards and a pen.

IMG_4060

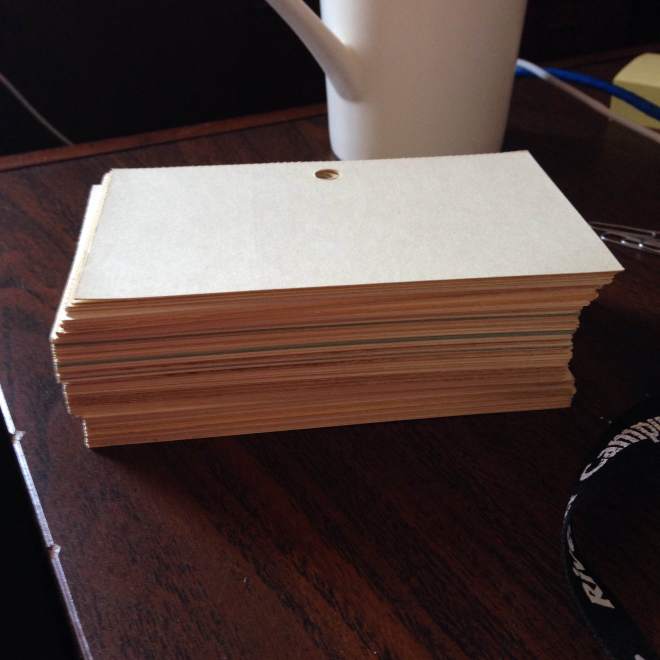
Every time you have an idea, jot it down. It doesn’t have to be thought through. It doesn’t have to be practical. It doesn’t even have to be what you’d consider a good idea, just jot it down. The funny thing about good ideas: sometimes it’s a so-called bad idea that lets good ideas show through. You let yourself think the impossible idea, the idea that’s too hard to accomplish, or too idealistic, or too much work to enact, and then your brilliant, completely achievable idea comes to you. When you think about things you can’t do, sometimes your mind will sneakily find a way that you can. So don’t restrict yourself. Writing them down means that even if your impossible idea doesn’t spark the really great idea in you, it might in someone else.

The other reason why you’ll want to collect all of your ideas, even the wildest ones, is this: at the end of it all, next Thursday, we’re going to do a live broadcast, and we’re going to share our best ideas with the world. (Well, the library world. Okay, maybe just our colleagues here at the River Campus, but still.) Write down all your bright ideas so that you’ll have lots to choose from in the end! You just can’t have enough ideas!

Thank you for your willingness to engage in this intensive program. I hope you’re excited about it. I know I am. I can’t wait to learn from you. See you soon!